Brief Intro:
I have a few things I’ve practiced baking/decorating a lot. And because it’s Christmastime, and sugar cookies have always been a staple of Christmas baking in my family, this is my gift to all of you lovely readers. My strategy for yummy and pretty sugar cookies.
I will not be one of those blogs that tells you the inane details of their day that no one cares about so you have to scroll and scroll and scroll and scroll until you finally get to the recipe you were searching for in Google and that puts all the ‘helpful tips’ scattered about in the 37 paragraphs above into a workable context. Logic shall win this day!
Recipes:
- 1 cup of butter (softened)
- 1.5 cups of granulated sugar
- 1 teaspoon vanilla
- 2 eggs
- 2 teaspoons baking powder
- 1/4 teaspoon salt
- 3 cups of flour + another 1-1.5 cups
- Cream the butter and sugar together – you can do this with a mixer, but I prefer to soften my butter until it’s partially melted and then whisk the butter and sugar together.
- Add the eggs one at a time, and then the vanilla.
- Combine the dry ingredients, including the 3 cups of flour only, and then add to the wet ingredients and combine well. This is where a large, sturdy wooden spoon works best; I tend to use my hands for the last little bit of working. Mixer is fine if you have a fairly powerful one, because the cookie dough gets thick.
- The dough is quite sticky at this point, particularly if you use the melted butter method. If you want quite cookies that expand and puff quite a bit in the oven, then chill the dough first, then you can roll it out on a floured counter and cut your cookies. Or:
- If you prefer cookies that keep their shape (my preference) and spread minimally, then add another 1-1.5 cups of flour to your dough. It should be much less sticky, but not dry and crumbly. You don’t want to add so much flour that you end up with cracks when you roll it out. With this method you do not have to chill the dough, but still flour the counter.
- Roll out the dough to desired thickness. I do fairly thick cookies unless I have a cutter that also makes impressions in the dough – then thick cookies don’t work so well. But otherwise, the commonly recommended 1/4″ thick cookies…no, thank you, ma’am. I’m not a fan of crunchy cookies, so I roll them thick (3/8″ roughly) and bake them carefully so they stay soft.
- Bake the cookies at 350F. Baking time will vary based on elevation (I use this recipe in two different provinces, and it can shift up to 4 minutes) and thickness of cookies…so I can give you a range of approximately 8-14 minutes. Guess who doesn’t use a timer? Bake your cookies until they are done, and see Tips & Tricks below for more info.
Icing:
I have three different icings I use for sugar cookies: basic butter icing (which tastes the best, imho), glaze, and royal icing (I know, royal icing can be a pain and a disappointment, bear with me).
Butter Icing
For this, I use my wonderful KitchenAid mixer because it can whip icing like nobody’s business. Mix 1 cup of softened butter with 1 cup of icing sugar, then add a splash of vanilla, a tablespoon of milk, and another cup of icing sugar. Divide your icing and colour it as you please.
Then you get to mess with consistency. If you just want to spread it with a knife, then you may want to thin it out with a little more milk.
If you want to pipe it and keep its shape, then this should be about the right consistency for the icing to hold its shape. It will need to dry some to be stackable, and it will stay fairly soft, just fyi.
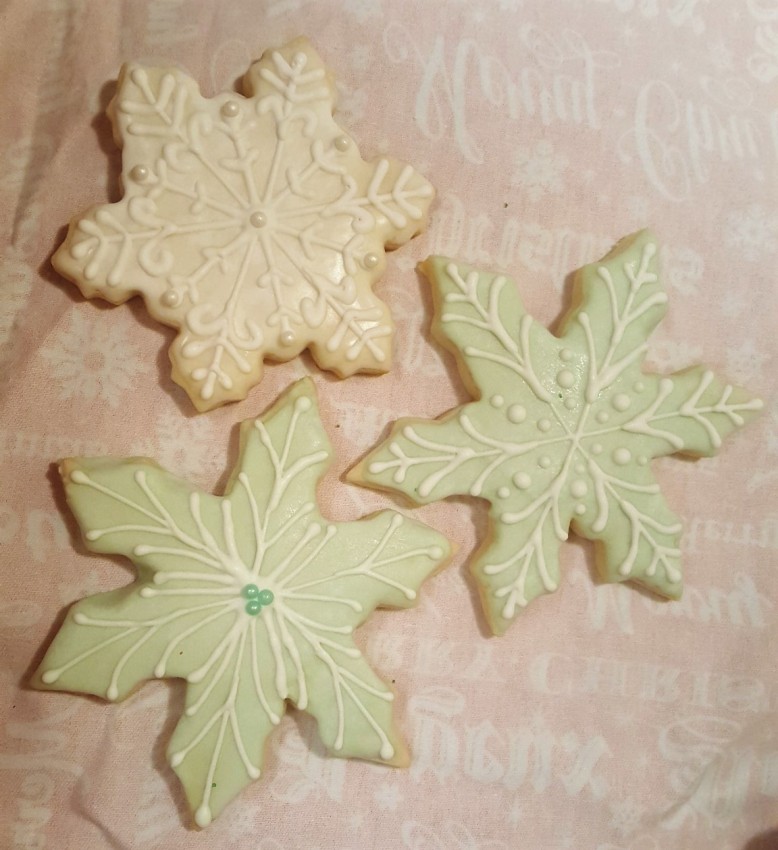
If you want to pipe nice, smooth lines (and have your icing be a little shiny) then I have had good results when I heat small amounts in the microwave for only 10 seconds at a time to avoid boiling the icing which will make it go rock hard and it becomes a useless mass. And then I put it in my piping bag, and ice until it cools off too much. It’s kind of messy, but it dries harder which is nice for stacking cookies.
Glaze
I started dipping the top of my cookies in glaze a few years ago, to give a nice, smooth layer of icing over which I could pipe (see picture above). The easiest way to make this glaze is icing sugar + milk, mixed together with a fork until it’s as thick as you’d like it. I like mine to be fairly thick (I like a good layer of icing), so it feels a little thicker than white glue. Then I dip the cookie in the icing, use my handy icing spatula to remove some of the excess, and then let the icing harden (I let it sit a solid hour or more) before piping on top. This is way faster than when I would do a layer of butter icing and then pipe on top.
Because I still like the taste of butter icing, I have made glaze with a little melted butter and vanilla mixed in. This glaze still hardens on top, but can stay soft underneath – which creates some logistical issues. If you want coloured glaze, I like this icing; for white glaze, skip the vanilla.
Royal Icing
Okay, I’m the first to admit, I’m not crazy about royal icing because it doesn’t taste like much. Butter icing is way better. So I in no way, shape, or form advocate using only royal icing unless you are making a gingerbread house that will not be eaten.
However.
This year, we had great results with this recipe from Sweetopia. Check out her tutorials on piping lines and dealing with icing consistency too, they were fantastic. I still do the above glaze, and then this icing worked great for piping, and hardened way more than the butter icing ever has. It doesn’t taste bad but I would never use it as a standalone icing. It hardens fast, fyi, so if you want to add sprinkles, sugar, or anything, do it right away.
Tips & Tricks:
- When rolling out the dough, always roll from the middle to the edge, life is just easier that way.
- If your dough becomes too dry, you can get away with working in a little water. But be aware that even this dough can become overworked and make a ‘tougher’ cookie.
- Always, always, always flour a cutter that also makes impressions well so your cookie does not remain in the cutter. And if I’m not making any sense, I mean cutters like this.
- Please make your life a happier one by lining your pans with parchment paper. Scraping the lovely cookies off of the &^%# @%$^#R%& ^%!*^&$@ pan is not a good time.
- For soft cookies, I bake them until I can just see them browning around the base (about 12 minutes in the oven for thick cookies). If the tops start to brown, then that is the absolute longest I want to leave them in.
- If you like crisp, crunchy cookies, no judgement; just bake them longer but do not change the oven temperature, and watch the tops as well as the base, as the base will likely brown faster than the tops.
- Use butter not margarine in the cookies and the icing – margarine will make the cookies spread more, and your icing stay too soft to stack your cookies without them sticking a lot.
- Icing spatulas are a gift from God.
- I deal with icing consistency after colouring because I use the regular liquid food colouring (unless I need a really intense red or green, which I try to avoid because even gels can give the icing a weird taste) and for small amounts of icing that can already mess with the consistency and sometimes requires a correction of more icing sugar.
- Sift your icing sugar. It’s a pain, but it’s less of a pain than dealing with lumpy icing that clogs your icing tips.
- Use the saran wrap method of filling your icing bags. So much cleaner. If you are using a soft icing (like royal icing), line a small bowl with the piece of saran wrap, spoon your icing into it, then wrap and proceed as usual (the bowl keeps the icing from running all over the place while you wrap it).
- Practice. Practice, practice, practice. Sometimes it’s nice to choose one or two cutters, make 4 dozen of them, and work on just a couple of designs. You can usually wipe piped icing off of a glazed cookie if you do it right away (with your finger works just fine, or a piece of paper towel), and start over. Or you can eat the evidence. Sometimes I need a break from eating my evidence, and then I resort to wiping and re-trying.
- Freeze cookies that need to be stored longer than three days. Storing baking in the refrigerator will dry it out, but freezing cookies not only makes them last longer but can also help keep your butter icing looking nice.
- For icing ideas, Pinterest. I work way better when I have a template in front of me, and I get pretty much all my ideas from Pinterest.
- Sugar pearls are fantastic. Not hard little ball bearings like those silver things, they’re soft enough you can crush them between your thumb and forefinger. They are very pretty, and they just taste like…sugar.
- Have milk on hand. Trust me on this.
Story of My Life as it Relates to Sugar Cookies for Those Still Reading:
I grew up baking these cookies with my Mom. Every year at Christmastime, we would bake two things for sure: sugar cookies and butter tarts. To this day, those are two of my most favourite things in the entire world.
Just getting out that same box of cookie cutters (Mom actually has this set of red cutters like the one I linked above, and I adore them even if they are tricky to use) and picking them up, the sight and feel of them triggering so many memories, is the most wonderful dose of Christmas spirit for me. I have my own cutters now too, but I still have to use at least a couple of my Mom’s.
I remember my Mom giving me and my siblings each a little ball of dough, and we’d select our cutters, and roll it out, make our cookies, being careful to flour everything from the little bowls of flour we were each assigned. I remember my brother knocking the ice cream pail of flour onto the floor one year too – which we always mention every time we bake these cookies. I remember icing them, in pink and green because we could never get the icing to quite go red.
And then somewhere during my university years I started working on my icing technique, and messing around with glazing them and using different icing tips, etc. I may have become mildly obsessed. Mom would wait to make sugar cookies, at least, until I could come home, and every year I’d try something a little different. I’d plan for weeks in advance usually, she and I coordinating ahead of time, and me leaving room to pack all of my decorating paraphernalia in my suitcase.
But the tradition has grown. One year my Dad’s wife asked for the recipe, and then asked me to bake them with her when I was out visiting. Since then it’s become a tradition to have a baking day there too. One year I even got my brother to help with cookies. His were zombies, but he was joining in on the tradition for the first time in years, and that was more than enough for me.
And now this year my sister-in-law is planning a baking day at her house. She and I first managed to bond over sugar cookies. We’ve had some rocky patches, nothing too horrible but holidays can be notably strained, so this baking day is already a little Christmas miracle that makes me so excited and hopeful that we can build a real friendship.
It’s not just the cookies. It’s being in that same kitchen I learned to make those cookies in. It’s the same house being filled with the smell of baking cookies, and listening to the same Christmas music as we bake and ice, it’s getting to spend time with the people I love. And getting to push myself and try new ideas. I cannot draw or paint or sculpt, but I can ice the daylights out of cookies.
So, I have had my baking weekend with my Mom (it’s morphed). I am looking forward to one, possibly two, more baking day with family back home. And I have a jug of milk and jar full of cookies, and Michael Buble and Twila Paris and Michael W. Smith, so my breakfasts over the next few weeks are going to be delightful.
